
Table of Contents
- Why Microscopy Matters for Species-Level Accuracy
- Spores as Diagnostic Structures
- Spore Size: How to Measure and Interpret Ranges
- Spore Shape: Profiles, Symmetry, and Variation
- Ornamentation: Smooth vs Textured Surfaces
- Spore Color, Transparency, and Optical Behavior
- Wall Thickness and Density Clues
- Germ Pores and Apical Features
- Spore Arrangement and Slide Context
- Population Thinking: Avoiding “One-Spore” Conclusions
- Prep Methods That Preserve Features
- Common Misinterpretations and Visual Pitfalls
- Where Mushroom Liquid Spores and Functional Spores Fit In
- A Repeatable Workflow for Confident IDs
- Wrap-Up
- FAQs
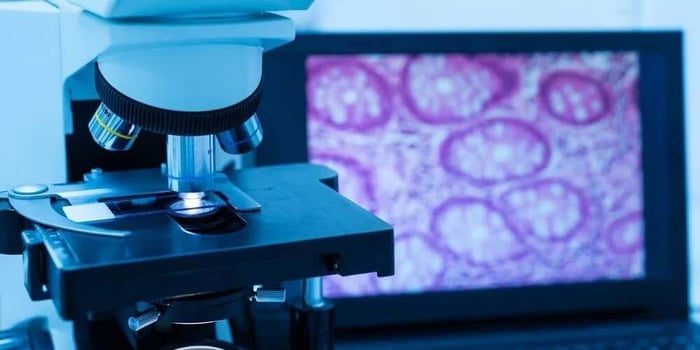
Species ID Through Microscopy is one of the most practical ways to make fungal identification more consistent, more repeatable, and far less dependent on “it looks like…” guesses. Macroscopic traits color, size, surface texture, bruising, growth pattern are helpful for narrowing options, but they can swing wildly depending on environment. Light, humidity, airflow, substrate, and age can all shift the way a specimen presents.
Microscopy pulls you into a different lane: stable, structural traits that are governed by genetics and designed to be consistent. Spores are at the center of that lane. When you learn which spore characteristics actually carry diagnostic weight and which ones tend to mislead you can build an approach that scales from quick comparisons to careful documentation.
This guide focuses on the spore features that matter most for identification, how to observe them without distorting them, and how to interpret what you see like a careful analyst rather than a hopeful guesser. If you’ve ever stared down a field of “maybe” spores and wondered what you’re supposed to trust, you’re in the right place.
Why Microscopy Matters for Species-Level Accuracy
At a high level, microscopy is valuable because it reduces the noise. Two specimens can look similar on the outside and still be very different at the microscopic level. The reverse is also true: two specimens can look different outside and still share microscopic traits that point to the same species or closely related groups.
A good Species ID Through Microscopy process doesn’t rely on a single “magic feature.” Instead, it builds a profile using multiple observations: spore measurements, shapes, surface textures, wall characteristics, and key internal structures. Think of it like verifying identity with multiple matching details instead of one shaky clue.

Spores as Diagnostic Structures
Spores exist for dispersal and survival, and that role comes with a set of structural decisions that tend to be conserved within a species. That conservation is what makes spore morphology so useful. Under the microscope, spores are often more consistent than tissues that are exposed to the environment.
In practical terms, spores give you measurable and comparable traits. When identification keys or lab references list spore metrics, they’re leaning on features that don’t casually change because the room was a little warmer or the substrate was a little richer.
Spore Size: How to Measure and Interpret Ranges
Spore size is one of the first details many people reach for, and it’s genuinely useful when handled correctly. The key is understanding that size is rarely a single number. A species typically has a size range, and that range can overlap with other species.
To make spore sizing meaningful, measure more than a few. You want enough samples to see the pattern: a typical length and width range, an approximate average, and whether the population is fairly tight or naturally variable. This is where many beginners accidentally sabotage accuracy by measuring one “perfect” spore and treating it as the definitive truth.
Also, calibration matters. If your microscope isn’t properly calibrated (or if you’re switching magnifications without accounting for scaling), your measurements can drift enough to push you into the wrong identification lane.
A reliable approach is simple: measure multiple spores, record the range, and look for consistency across different parts of the slide. Spore size becomes most powerful when it supports other features shape, ornamentation, wall thickness rather than acting alone.
Spore Shape: Profiles, Symmetry, and Variation
Shape is another high-value characteristic because it helps separate groups that share similar sizes. Spores may be broadly elliptical, nearly spherical, cylindrical, almond-like, lemon-shaped, or more irregular. But the real trick is remembering that shape can look different depending on orientation.
If you only look at spores in one focal plane, you can miss how they present in profile. A spore can appear oval from one angle and slightly flattened from another. Slowly adjusting focus can reveal whether the spore is truly symmetrical or if it has a subtle “face” or flattened side.
A smart practice is to describe shape in a way that includes both form and nuance: “elliptical with slight taper,” “oval with one flattened side,” or “subglobose with mild asymmetry.” Those small details add up fast when comparing your observations to reference descriptions.
Ornamentation: Smooth vs Textured Surfaces
Ornamentation refers to surface texture. Some spores are smooth and clean-edged. Others show warts, spines, ridges, bumps, or net-like patterns. This feature can be highly diagnostic because it’s often species-specific and difficult to fake through environmental factors.
The challenge is that ornamentation can be subtle. It may only become obvious at higher magnification, with careful lighting, and with a slide that isn’t overloaded with debris. If the sample is thick or the spores are stacked, surface texture can be masked.
When ornamentation is present, document it carefully: is it evenly distributed, concentrated in zones, sharp or rounded, fine or coarse? A “slightly rough” surface is not the same as clearly warted or spiny ornamentation, and those differences matter in formal comparisons.
Spore Color, Transparency, and Optical Behavior
Spore color can be surprisingly tricky. Some spores are hyaline (essentially transparent), others are pale tinted, and some are clearly pigmented. The problem is that lighting, thickness, and mounting medium can change how color appears. A spore that looks darker might not actually be pigmented—it may simply be thicker-walled or sitting in a way that refracts more light.
A practical approach is to look for consistency. If most spores share the same tint, that’s more meaningful than one spore that looks darker because it’s overlapping or out of focus. Also note whether the spore interior looks clear, granular, or shows distinct internal content.
When color is used in identification references, it’s typically referring to intrinsic pigmentation rather than random optical artifacts. So take your time, adjust illumination, and compare across multiple spores.
Wall Thickness and Density Clues
Spore walls can be thin and delicate or thick and robust. Wall thickness influences how spores handle pressure during slide prep and how sharply they appear under focus. Thick-walled spores may look more defined and sometimes darker at the margins; thin-walled spores can appear faint or even slightly collapsed.
Wall features matter because they often align with taxonomic groups and survival strategies. In a Species ID Through Microscopy workflow, wall thickness becomes most useful when it matches other traits: consistent size range, stable shape, and confirming structures like germ pores.
The main caution is not to confuse “thick wall” with “shadow.” If illumination is too harsh or the spore is not in a clean focal plane, edge shadows can mimic thicker walls. Fine focus adjustments and consistent lighting help you avoid that trap.
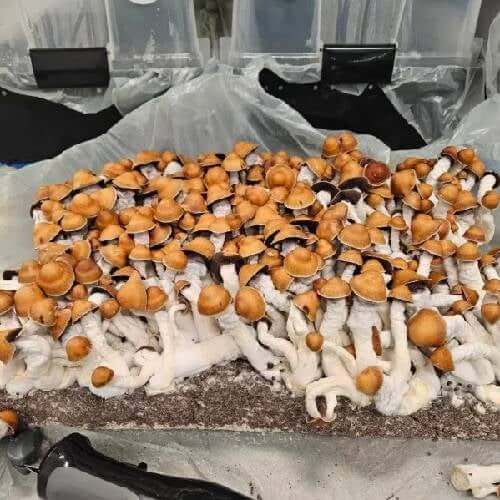
Penis Envy Mushroom Spore Syringe

$22.99
$24.99
PE#6 (Penis Envy 6) Mushroom Spore The Penis Envy #6 Mushroom Spore Syringe from Magic Spore Labs delivers basidiospores from the most systematically refined expression of the Penis Envy lineage available in the Psilocybe cubensis research catalog — a sixth-generation… read more
Germ Pores and Apical Features
Germ pores are specialized openings where germination begins. They can appear as a clear spot, a depression, a small flattened zone, or a distinct pore at one end. The presence, position, and appearance of germ pores can be highly diagnostic.
Some spores show obvious pores; others have subtle features that require careful focus and good contrast. If you’re hunting for germ pores, reduce distractions: aim for a thinner mount, look for isolated spores, and adjust lighting to highlight edge detail rather than washing everything out.
Apical features also include tapered ends, slightly thickened tips, or consistent asymmetry near one end. Those details can help separate “generally similar” spores into more distinct categories.
Spore Arrangement and Slide Context
Spores don’t always show up as neat, isolated objects. Sometimes they’re clustered, layered, stuck to debris, or oriented in ways that hide important features. Arrangement isn’t usually a primary species marker, but it provides context that can support your confidence.
For example, if the slide is overloaded, you may be misreading shape because spores are pressing into each other or distorted by pressure. If spores are scattered cleanly, you can more easily evaluate shape, ornamentation, and internal features without interference.
The best habit here is simple: observe multiple areas of the slide. Don’t build your conclusion from a single “nice” cluster when another area tells a different story.
Population Thinking: Avoiding “One-Spore” Conclusions
One of the biggest upgrades you can make to your Species ID Through Microscopy process is switching from “individual spore thinking” to “population thinking.” Every species has some natural variation. If you focus on one spore that looks slightly different, you can drift away from what the sample is actually telling you.
Instead, look for the dominant pattern. Are most spores within the same size range? Do most share the same shape? Does ornamentation show up consistently, or only in a few questionable objects? When your observations align at the population level, your identification becomes far more stable.
This also helps you catch contamination or mixed samples. If you see two clearly different spore populations, that’s not a “weird species” it’s a sign you need to separate variables before drawing conclusions.
Prep Methods That Preserve Features
Slide prep matters more than most people realize. Too much pressure can crush spores. Too much material can hide ornamentation. Dirty tools can add debris that looks suspiciously biological.
A clean, gentle preparation typically produces the best diagnostic clarity. Aim for a thin mount where spores are spread out rather than stacked. If your coverslip is pressing hard enough to distort spores, you’re trading image clarity for identification errors.
Consistency is key. When you prep slides in a similar way each time, your comparisons become more meaningful because you’re not constantly fighting new artifacts.
Common Misinterpretations and Visual Pitfalls
Microscopy introduces its own challenges. Common pitfalls include:
Mistaking debris for spores
Confusing air bubbles with structures
Over-interpreting lighting artifacts
Training the eye to distinguish true biological features from visual noise takes time and repeated observation.
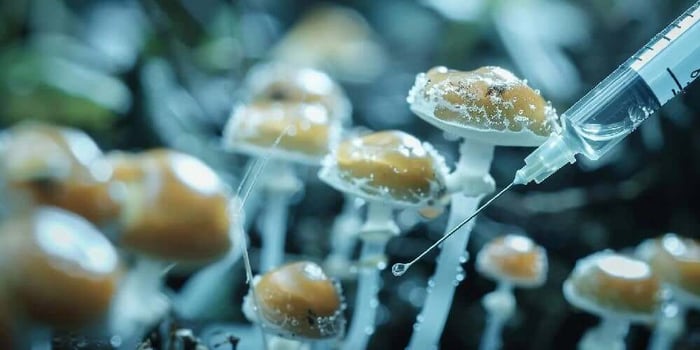
Where Mushroom Liquid Spores and Functional Spores Fit In
Controlled samples can make observation cleaner, especially when you’re practicing measurement and shape recognition. Mushroom Liquid Spores often disperse spores more evenly, which can help you observe isolated spores without heavy debris. This can be useful for building confidence in size ranges and basic morphology.
Functional Spores is a phrase often used to emphasize structural integrity and viability in a broad, educational sense. While “function” and “identification” aren’t the same thing, well-preserved spores are simply easier to read. When spores are intact, diagnostic traits like wall thickness, germ pores, and surface texture are clearer and more consistent.
The important takeaway is that sample cleanliness and preservation help you observe what matters. The microscope can only show what the slide allows you to see.
A Repeatable Workflow for Confident IDs
A strong workflow doesn’t need to be complicated it needs to be repeatable. Here’s a practical sequence you can use: start with a scan to find clean fields, shift to higher magnification for shape and detail, measure multiple spores, then confirm supporting features like ornamentation and pores.
Record what you see in consistent terms. Instead of “kind of oval,” write “elliptical; average length range observed across multiple spores; smooth walls; possible single germ pore at one end.” That level of description is what makes your notes useful later.
Over time, this becomes a personal library of observation. And that’s where Species ID Through Microscopy really shines: you’re building a process that improves with each slide, not a guessing habit that resets every time.
Wrap-Up
The spore characteristics that matter most are the ones that hold steady: size ranges, shape and symmetry, surface ornamentation, wall thickness, pigmentation behavior, and key structures like germ pores. When you observe these features across multiple spores and multiple slide fields, you move from “maybe” to meaningful documentation.
If you keep your preparation consistent, avoid one-spore conclusions, and treat identification as a pattern-matching process rather than a quick label, your results will improve fast. That’s the heart of a trustworthy Species ID Through Microscopy approach.
FAQs
What spore characteristics are most reliable for identification?
The most reliable traits are those you can confirm across many spores: size range (not a single number), consistent shape and symmetry, surface ornamentation (smooth vs textured), wall thickness, and recognizable structures such as germ pores.
Why do spores sometimes look different from one slide to another?
Differences often come from preparation and optics rather than biology—thickness of the mount, pressure on the coverslip, lighting intensity, and focus depth can all change what you think you’re seeing. Observing multiple fields and multiple spores helps separate true traits from artifacts.
Can Mushroom Liquid Spores help improve microscopy practice?
Yes. Because spores can be more evenly dispersed and less cluttered by debris, Mushroom Liquid Spores can make it easier to practice measuring, evaluating shape, and spotting diagnostic details without fighting a crowded slide.